


LEARN MORE


What to Do When You Receive a Meeting Invitation and Draft Agenda
Applies to:
- Admin Assistant (dedicated support for the committee)
- Committee Co-Chair (a worker and an employer)
- Committee Regular Member
- Committee Alternate Member
Note
Ex-Officio (non-voting)- This role only has a view mode of the following functionality.
Employer Practitioner and Guest-These roles will only receive an email with the meeting invitation (ICS file) and the draft agenda (PDF format).
Confirming Attendance
- Open the committee dashboard by clicking the ‘Dashboard’ tab on the page header and selecting your committee’s name.
- Click the ‘Meeting & Actions’ tab on the left side.
- Select the ‘New Meetings’ link.
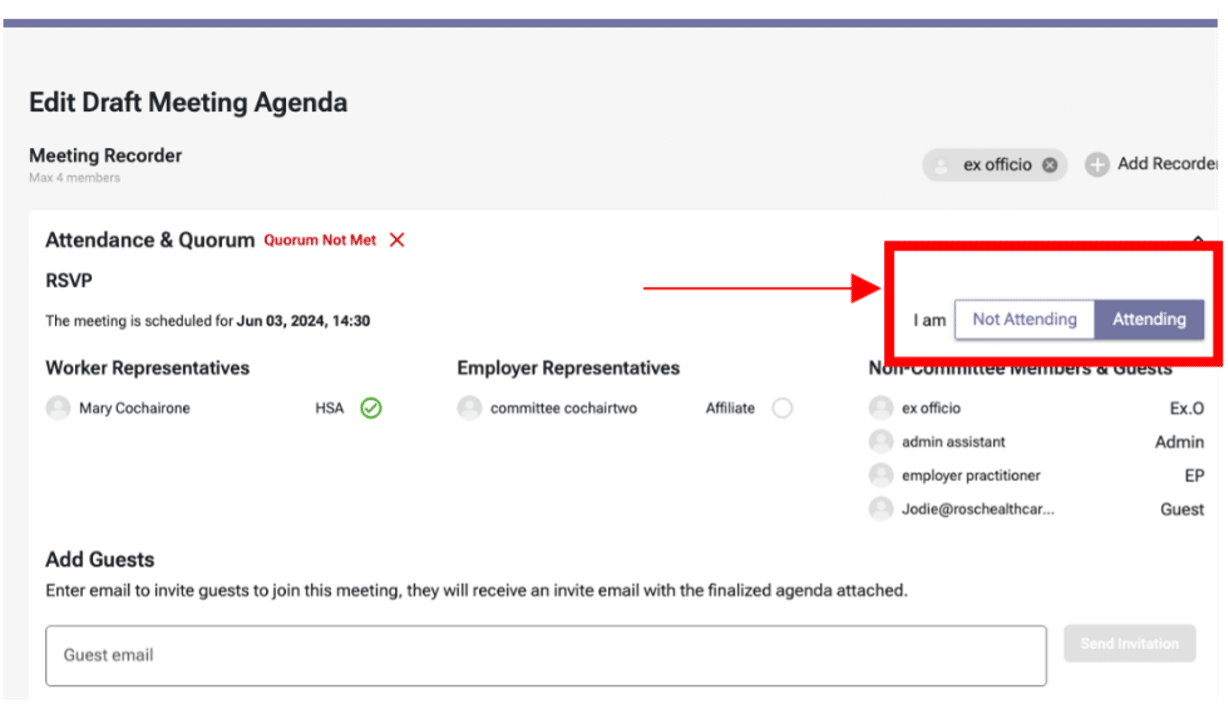
- Click the ‘Edit Agenda’ button.
- Select the ‘I am Attending’ or ‘I am Not Attending’ option at the top of the screen.
Note
The option to confirm you are attending pertains only to your own invitation. You cannot confirm anyone else’s availability on this screen.
- Before the meeting, review the draft agenda and provide feedback or suggestions from the PDF of the ‘Draft Agenda’ by following these steps.
Sending a Recommended Agenda Item
- On the ‘Edit Draft Meeting Agenda’ page, click the ‘+ Add’ Create New Suggestions’ button (highlighted in the screenshot below) to add your suggestions.
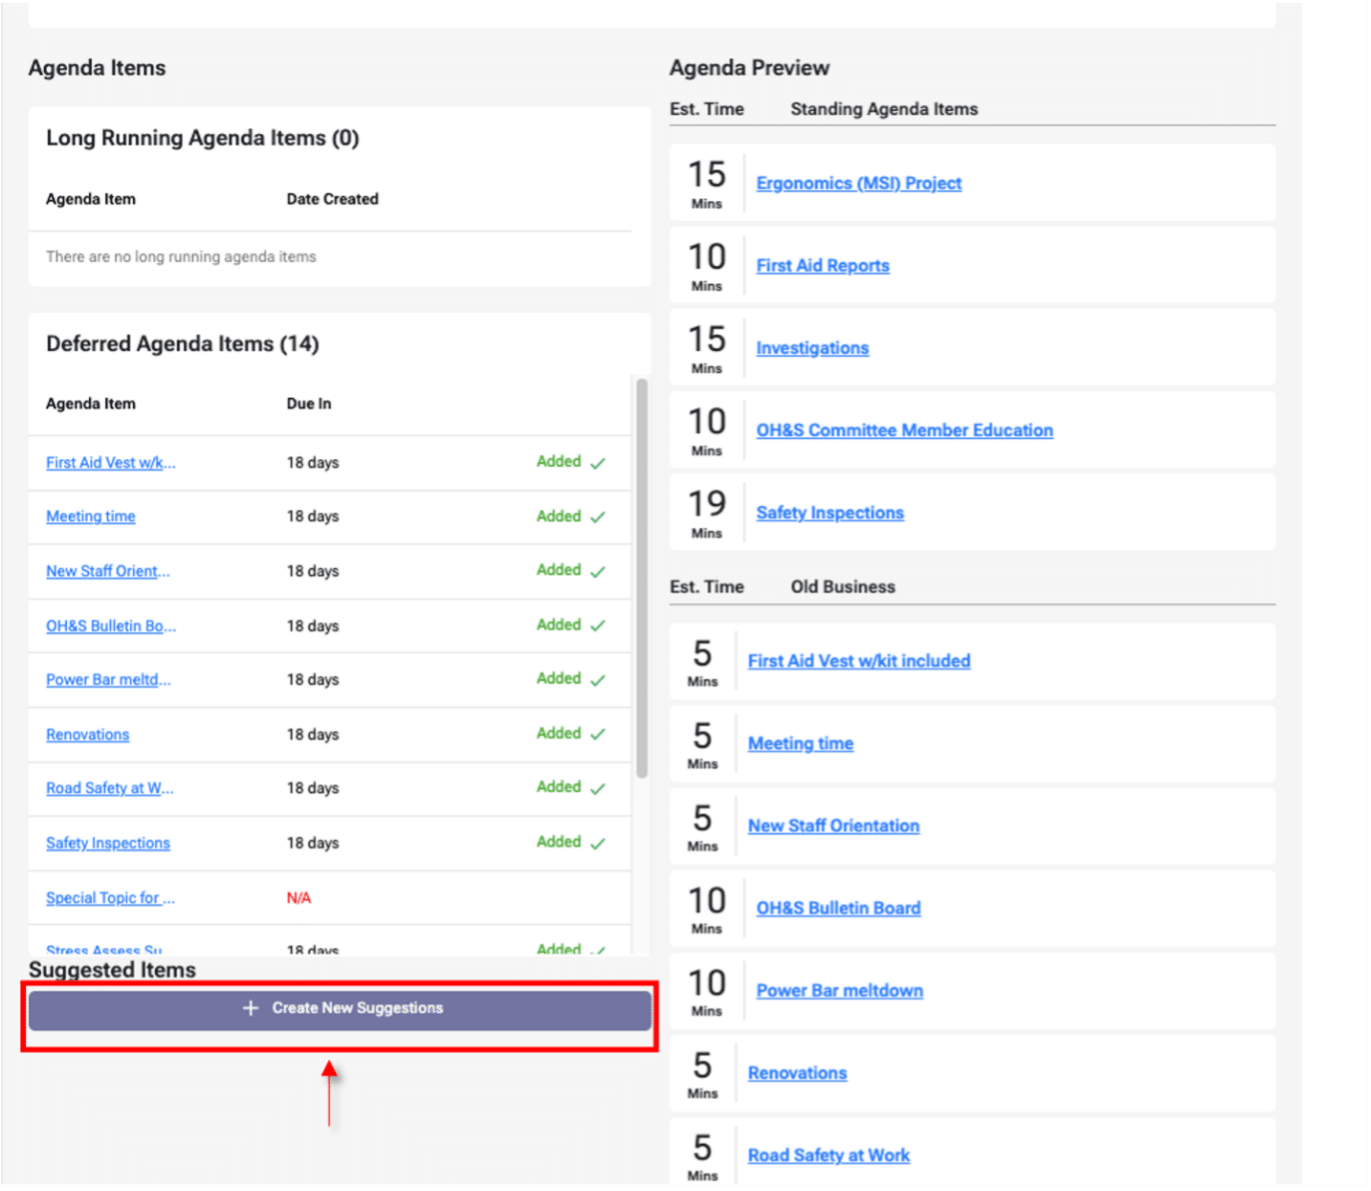
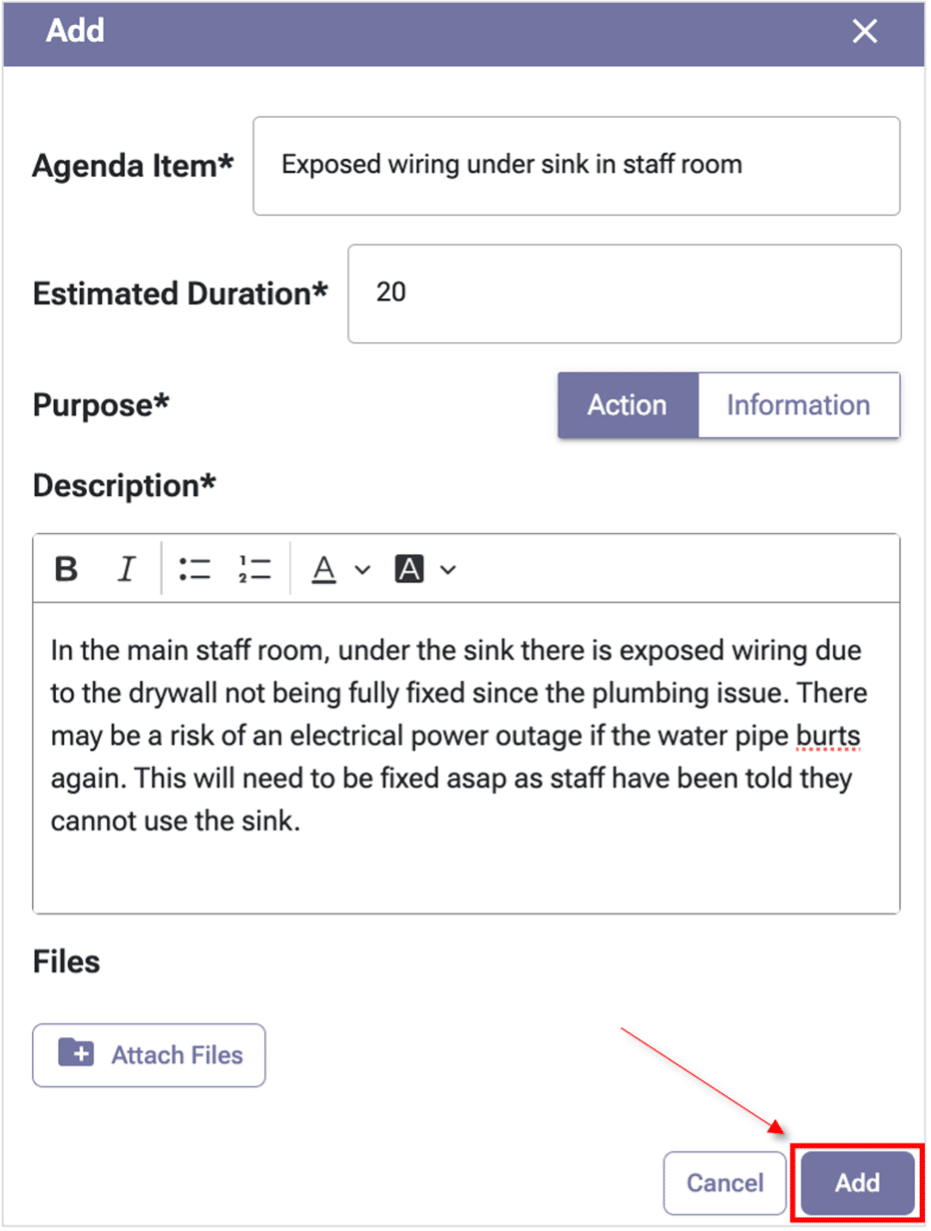
- After selecting ‘+ Create New Suggestions’, the ‘Add’ form will appear. There are five fields to complete this process, they are as follows:
- Agenda Item
- Estimated Duration
- Purpose (Action or Information)
- Description
- Files (if it is applicable)
- Confirm the information you have added is accurate.
- Once accurate, select ‘Add’.
- A pop-up box will appear to allow you to confirm the information or go back to edit if it is not accurate.
- Click ‘Yes, Submit’ once all information is correct.
Note
You can also add a new business (Suggested Agenda Item) from the Agenda Item library, and they will automatically be populated to the ‘New Business’ section in the draft and suggestion agenda phase.
Instruction to go to the Agenda Item library:
Dashboard->Meeting & Actions->Agenda Items->Suggested Agenda Item->Add.
- If they were added in error or are no longer needed, ‘New Business’ agenda items can be deleted during a meeting. They cannot be deleted after a meeting has been adjourned. They can be deleted from:
- The Agenda Item library
- The Edit Draft Agenda page
- The Finalized Agenda page; and
- The Meeting Interface page.
Reviewing a Recommended Agenda Item
- As a Committee Member, particularly a Co-Chair, you will need to review recommended business agenda items.
- To do this, you will first select: ‘Meetings and Actions’, followed by ‘New Meetings’.
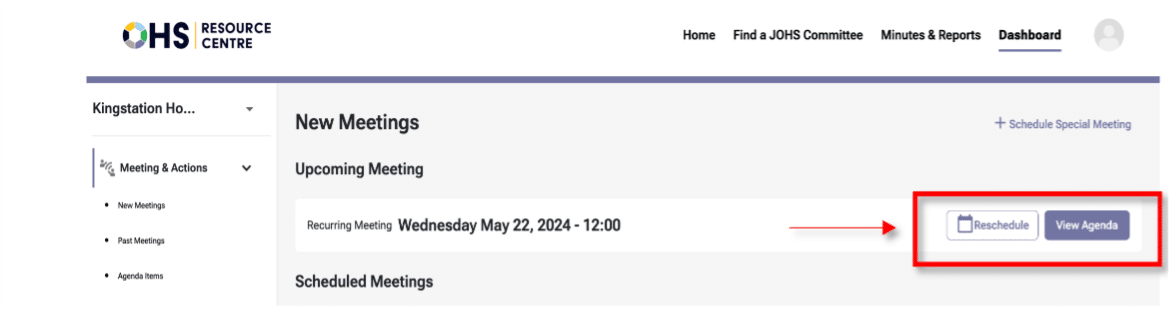
- Once you access the ‘New Meetings’ page, select ‘Edit Agenda’ or ‘View Agenda’. Depending on the current phase of the meeting preparation, one of the two buttons will be available.
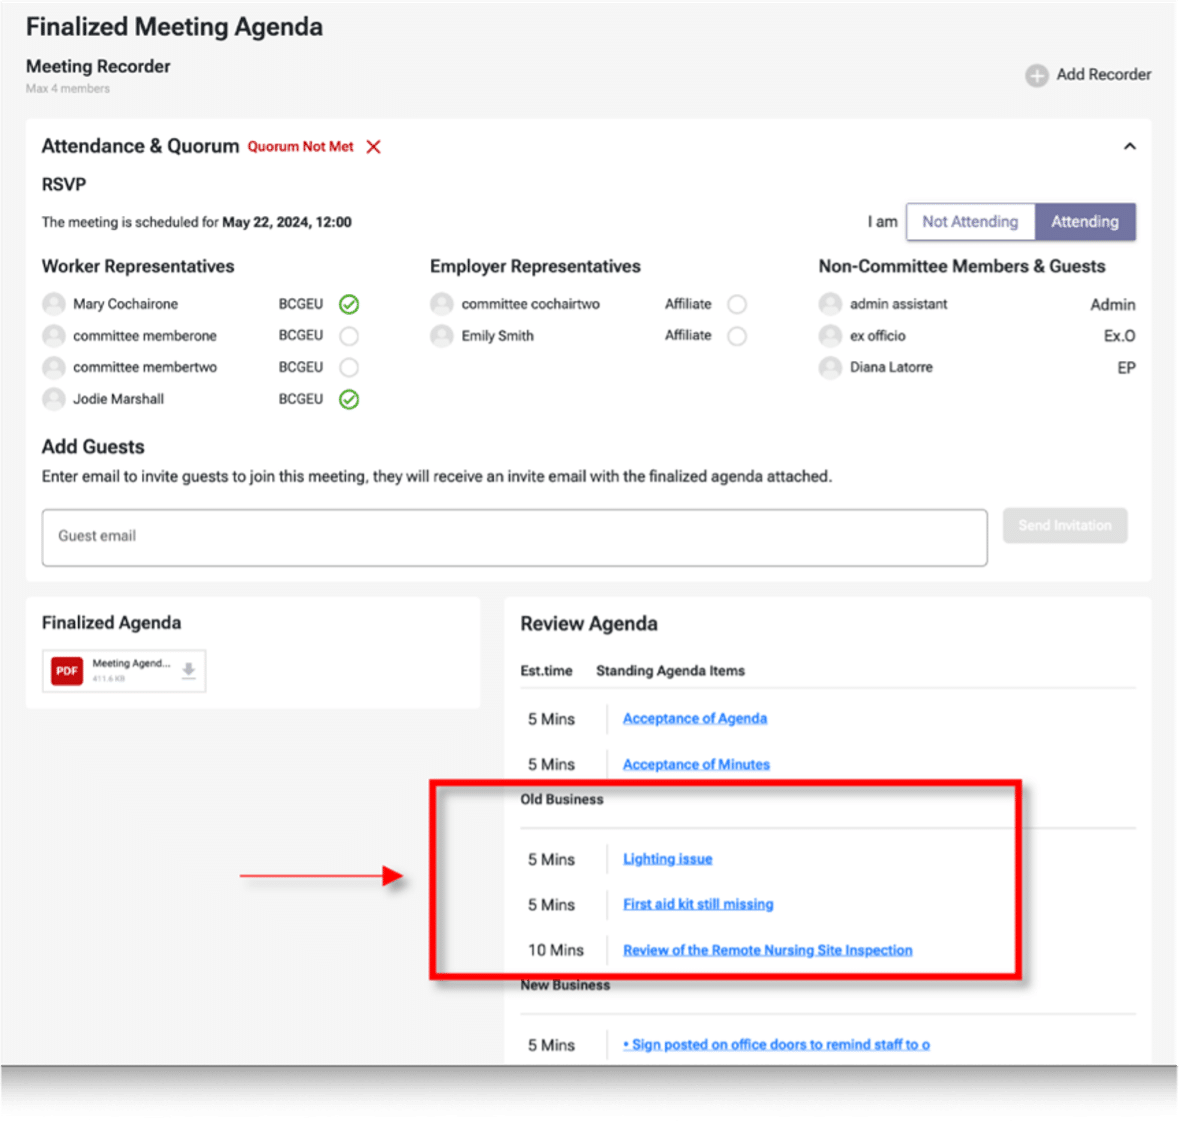
The ‘Edit Agenda’ button will take you to the ‘Edit Draft Meeting Agenda’. The ‘View Agenda’ button takes you to the ‘Finalized Meeting Agenda’ page. From there you can:
- Add /edit the name of the committee member who will record the meeting.
- Review attendance and quorum status
- Add guests
- Review the current agenda including Standing, Old, and New business.
- Co-chairs or admin assistants can reorder agenda items (Standing, Old, or New Business). The updated order will carry over to future meetings unless it changes again before the next meeting.
- Here, you can review the ‘Suggested Agenda Items’ (New Business) or detail for the meeting.
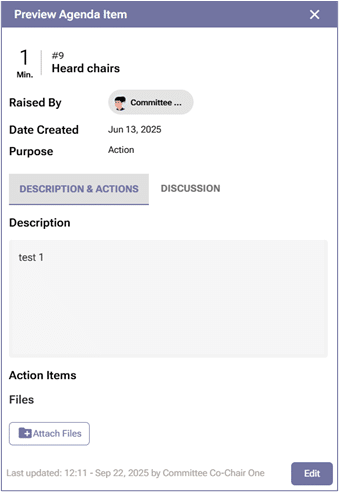
- Click the linked agenda item name of the item you would like to review. Preview agenda item box will appear containing the suggested agenda item name, raised by, date created, purpose, description, and files (if attached). You can edit an agenda item by clicking the ‘Edit’ button to update its details. You will also be able to view information such as the date, time, and the name of the person who last updated the agenda item.

- You can review who suggested agenda items by clicking on the hyperlinked agenda item name, which opens up ‘Preview Agenda Item’ box. At the top of the preview modal, look for ‘Raised By’, as this will tell you who proposed this item. This field can be edited to update the name of the member who actually raised the item, if different from the original creator.
Note
- The name associated with ‘Raised By’ can be updated from the original creator of the agenda item to the committee member who raised the item.
Reviewing Old Business Items
- As a Committee Member, particularly a Co-Chair, you will need to review old business agenda items to know the status of action items to report updates to the system.
- To do this, In the ‘Edit Draft Meeting Agenda’ or ‘Finalized Meeting Agenda’ page screen is where you can review attendance and quorum status, add guests, review the finalized agenda (standing agenda items and new/old business).
- To review ‘Old Business’ items, select the chosen item (hyperlinked) in the box. The Co-Chairs or Admin Assistant role can remove or rearrange old business items.
- When you click on the hyperlinked agenda item name ‘Old Business’ item or Standing Agenda Item, a preview window will appear that contains the details of the previous meeting’s discussion notes, and the status of the action item(s) associated with it. By clicking the ‘Edit’ button in the bottom-right corner of the preview mode, you can update fields such as Agenda Item Name, Raised By, Duration, Purpose, and Description. You will also be able to view the “Last Updated” details, including the time, date, and member who made the changes.
Opening and Accepting a Meeting Invite (ICS File):
- Depending on the email program committee members and guests use, the ICS file process may look different. However, the general process is described below:
Receiving the Invite:
- Email Notification – The user receives an email notification with the meeting invite attached as an ICS file. This email is usually sent by the OHS Resource Centre system, which manages the calendar invites.
Opening the ICS File:
- Email Client – Open the email containing the ICS file attachment. Most email clients (such as Outlook, Gmail, and Apple Mail) display the ICS file as an attachment or within the email body.
- Download/Preview – Click on the ICS file to either download it to your device or preview it within the email client. In most cases, clicking on the file will automatically be displayed, and you can add it to your calendar.
Note
You may get a security warning message; you need to allow the system to open and save the invitation.
Reviewing the Invite:
- Event Details – Review the meeting details, such as the date, time, location (if applicable), and any additional notes or agenda items included in the invite. This information is typically displayed in a pop-up window or within the calendar application interface.
Accepting the Invite:
- Calendar Application – Use your calendar application (such as Google Calendar, Microsoft Outlook, or Apple Calendar) to add the invite to your calendar.
- Confirmation – You need to confirm your attendance using the OHS Resource Centre system. To see the steps, please see the ‘Confirming Attendance’ section.
Synchronization:
Automatic Sync – Depending on your calendar settings, you may receive notifications or reminders as the meeting date approaches.
Note
Currently, committee members will not receive notifications if a meeting is rescheduled. The system currently does not send automatic notifications for rescheduled meetings. Until the system can automate notifications, users must manually inform participants about the rescheduled meeting details. This can be done via email or other communication channels.