Meeting Invitations
Applies to:
- Admin Assistant (dedicated support for committee)
- Committee Co-Chair (a worker and an employer)
STEPS
- On the ‘Meeting Invitation’ page, you can review, adjust, and send meeting invite notifications. If the co-chairs or admin assistant haven’t sent out the agenda yet, the system will automatically send the meeting invitation along with the draft agenda 14 days before the meeting. The system will also send the final about 7 days before the meeting.

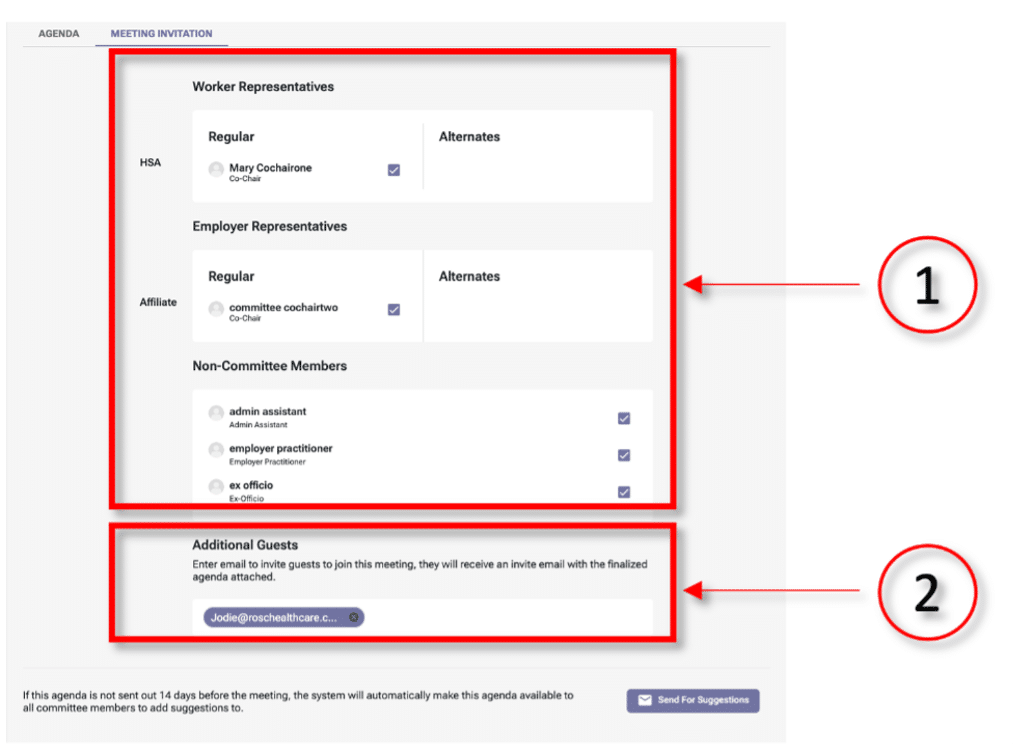
- You can review all attendees and select/deselect any members who may be on vacation, for example (screenshot number 1). You can also add guests by entering their email addresses in the ‘Additional Guests’ form at the bottom of the screen (screenshot number 2). All names listed in these forms will receive all related meeting notifications and documents as reminders.
- Once this information has been added and validated, you have two options:
- As Co-Chair or Admin Assistant, you can select the ‘Send for Suggestions’ button, which will start the process for this meeting (highlighted in the below screenshot).
- You can choose to wait for the automated system to process the invites and notifications, which it will do at the 14-day mark. This is to allow a different co-chair to add their own details or agenda items as they need.

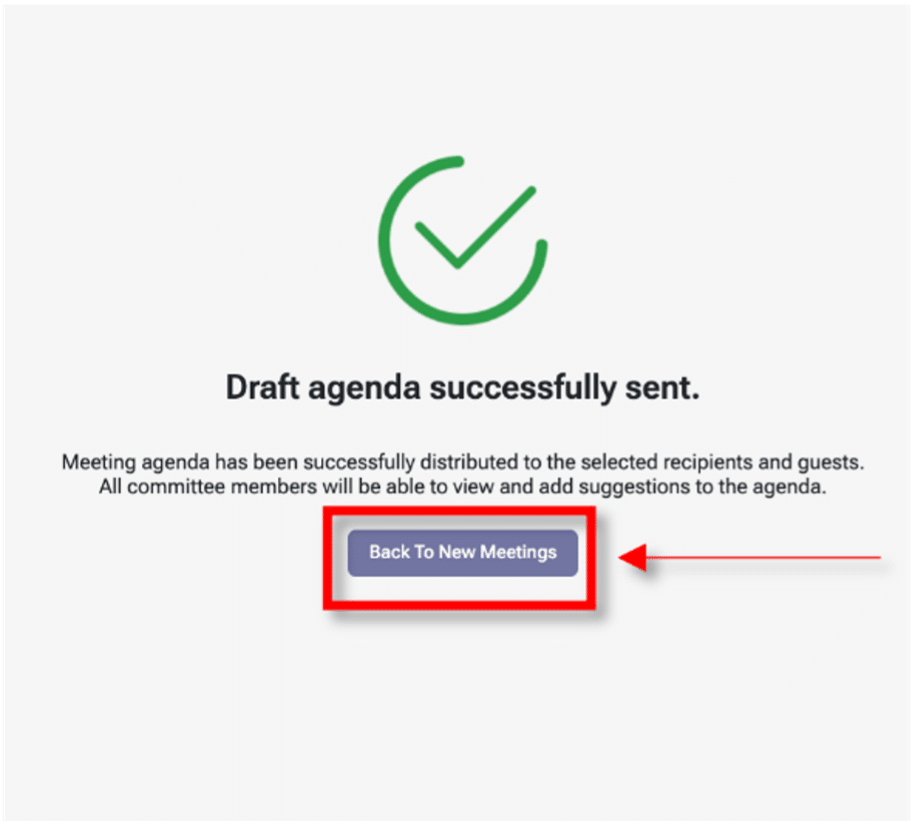
- Once you select the ‘Yes, Submit’ button, you will receive confirmation that the draft agenda has been successfully sent. To move to the next stage of this process, select ‘Back to New Meetings’.
- Once you have selected ‘Back to New Meetings’ and selected the upcoming meeting date, you will be brought back to the ‘Edit Draft Meeting Agenda’ page. From here, once the agenda is confirmed or seven days before the meeting’s date, select the ‘Finalize Agenda’ button. If the finalized agenda has yet to be sent seven (7) days before the meeting, the system will automatically send the finalized agenda to the selected committee members on ‘Meeting Invitation’ screen in ‘Draft Agenda’ phase.
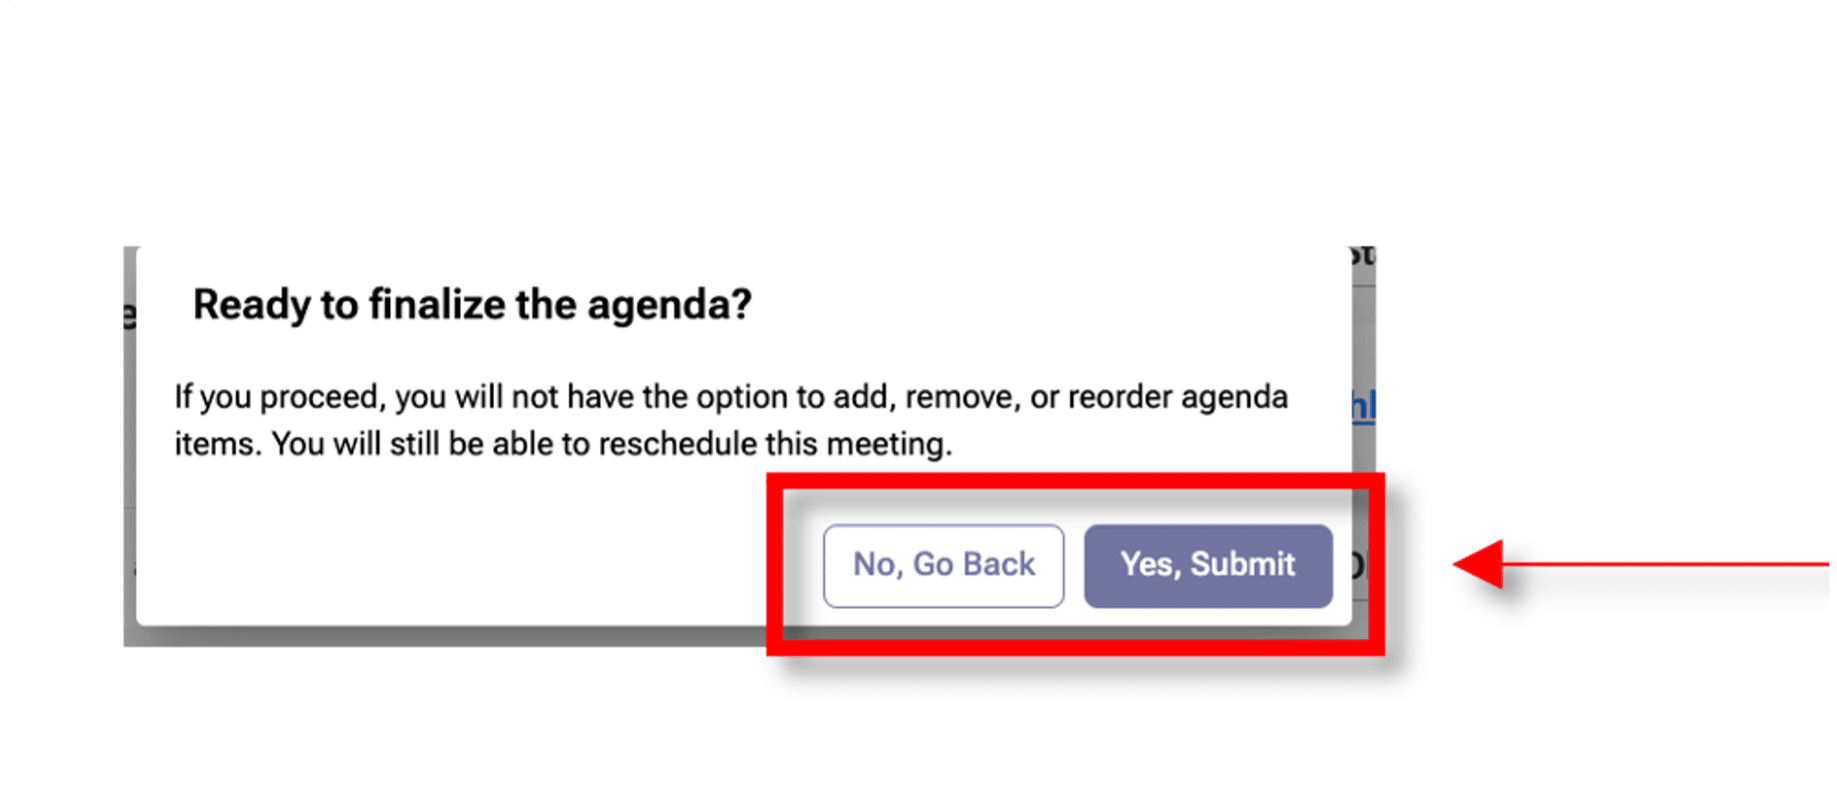
- Here is an overview of what the ‘Finalize Agenda’ option will do:
Overview of the ‘Finalize Agenda’ Function:
1. Confirmation and Locking:
Agenda Confirmation: The “finalize agenda” function confirms the agenda items, marking them as final. Once finalized, the agenda items are locked, meaning no further additions, deletions, or changes can be made until the meeting date.
Locking Function: This function effectively locks the agenda to maintain its integrity and ensures all participants are working from the same finalized version. Once the agenda is finalized, it will be locked, and no further changes can be made. The finalized agenda will be sent out 7 days before the meeting date and will remain unchanged until the meeting takes place.
Note
Once the agenda has been finalized, check back at the ‘New Meetings’ option and select the upcoming meeting date. You will notice that you can no longer add or edit any agenda items as these functions are locked until the meeting date, but you can still add/edit the recorder. You can only preview these details.
2. Notification and Distribution:
Agenda Distribution: The finalized agendas is distributed to all relevant/selected parties, providing a clear outline of the topics to be discussed during the meeting. Members also receive minutes from the previous meeting along with the finalized agenda.
- At this point, the meeting attendees will be automatically notified, and a copy of the finalized meeting agenda, the previous meeting minutes (if they exist), and an iCalendar file (ICS file) with the meeting information will be sent, along with the date and time.
Note- The draft meeting agenda notification includes a draft agenda PDF and a .ICS file, while the finalized agenda notification includes a finalized agenda PDF, the previous month’s meeting minutes (draft or finalized, if available), and a .ICS file.
- The following images are examples of a meeting invite (1), the finalized meeting agenda PDF (2), and previous meeting’s minutes (draft or finalized) (3). In the second screenshot, you will note that each agenda item has a unique number. This is to help co-chairs keep track and easily locate specific agenda items if status updates or follow-ups are required.
Example of Meeting Invite

Finalized Meeting Agenda


Example of Previous Meeting’s Publish Minutes

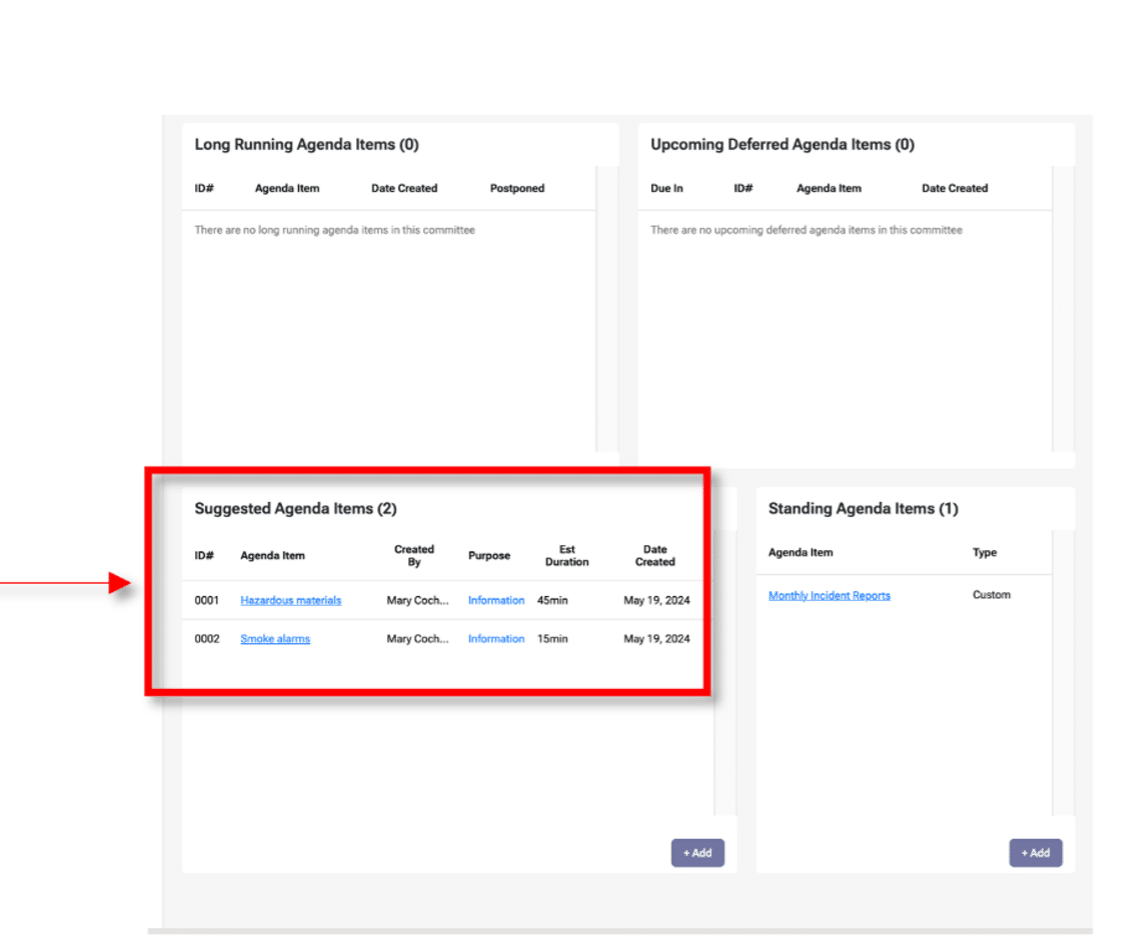
- As a Co-Chair, you are encouraged to review the ‘Agenda Items’ dashboard to see what agenda items other committee members may have requested before the meeting.
