Create the Structure of your JOHSC Recurring Meetings
Applies to:
- Committee Co-Chairs (a worker and an employer)
- Admin Assistants
Sign in with your Co-Chair or Admin Assistant account
- Following the instructions in manual ‘OHS Resource Centre User Management Manual’.
- On the header of the page, click on the ‘Dashboard’ tab.

- From the drop-down options, select the committee you belong to.
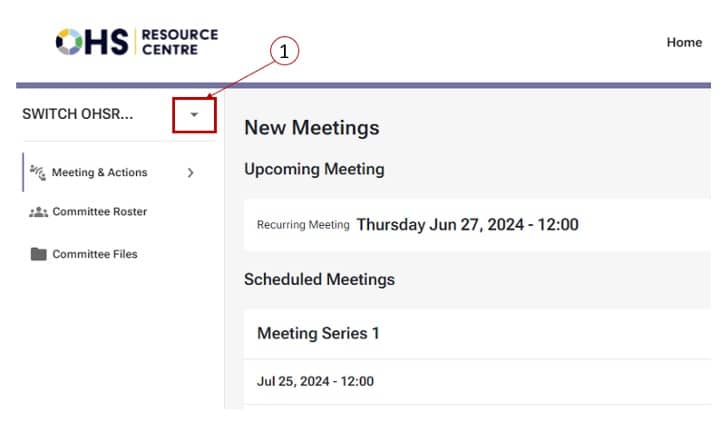
- By default, you will land on the ‘New Meetings’ page, where you can schedule either a ‘Special Meeting’ or a ‘Recurring Meeting’.
Note
- The quorum requirement needs to be set up before a meeting is started. Setting a quorum requirement is done under the ‘Committee Roster’ tab.
- Once the ‘Start Meeting’ button has been clicked, the system will automatically calculate whether the quorum has been met or not.
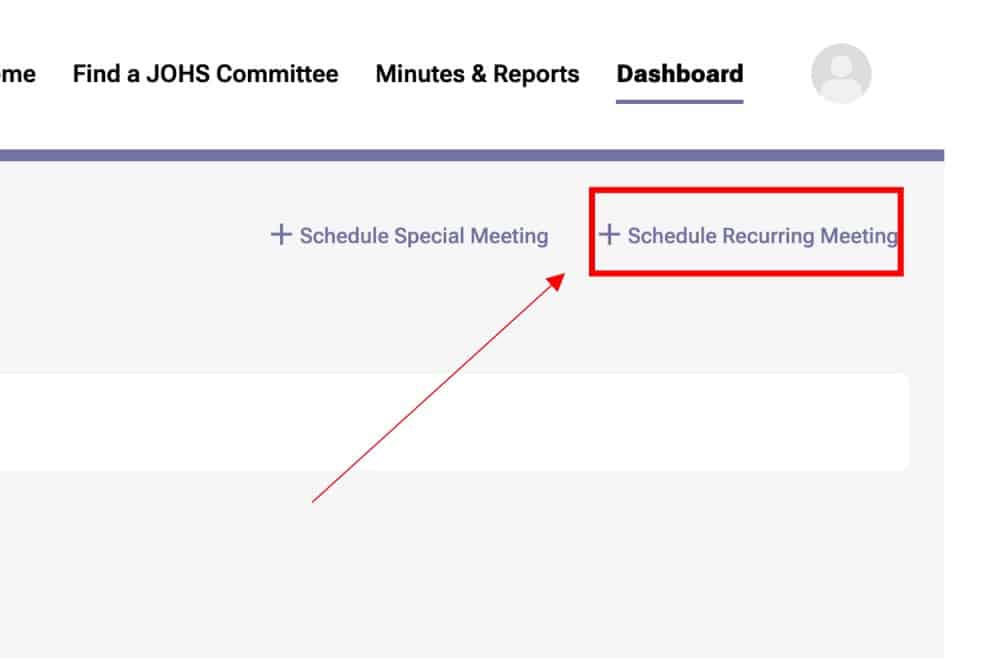
- Select ‘+Schedule Recurring Meeting’. You will then be taken to a form that will allow you to schedule the recurring meeting. In the ‘Meeting Location’ box, add your meeting location.
- In the ‘Dial-in Options’ box, copy and paste your virtual meeting invite link or dial-in options, as shown in the screenshot. Remember to leave contact details in case an attendee experiences difficulties in attending the meeting.
Note
- The meeting invite details need to be the full URL (not just the hyperlinked text, otherwise, the meeting invite file will not be clickable for recipients).
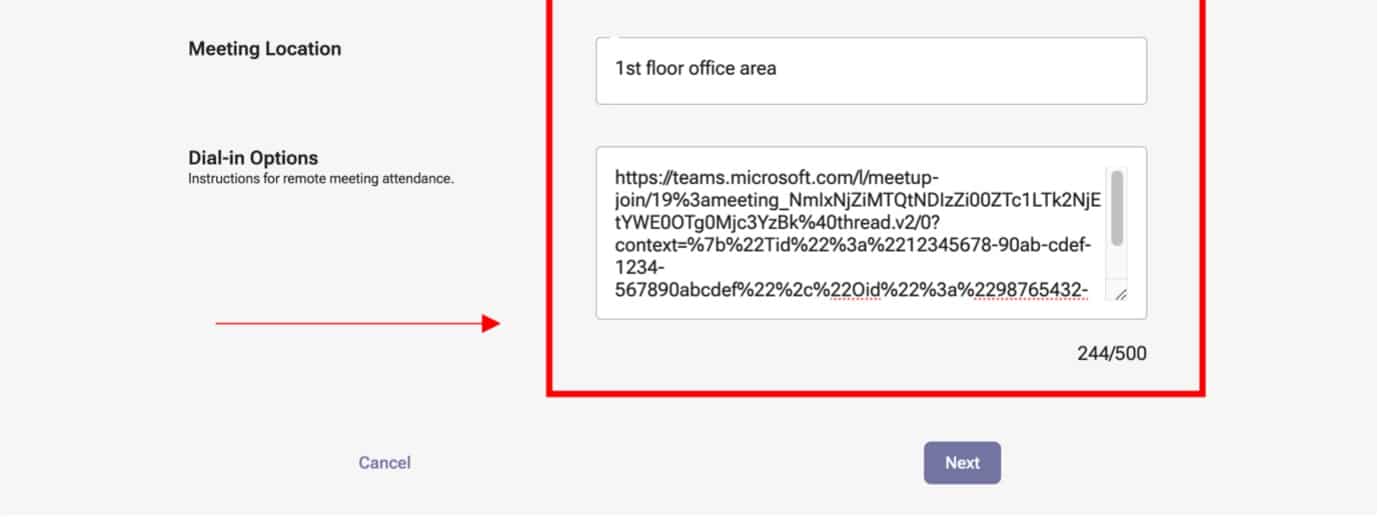
- Once you have added the meeting location and dial-in options, select the ‘Next’ button under the ‘Dial-in Options’ box.
- The next page is where you will set up the recurring meeting. To specify when the meetings will occur, select the month and year from the ‘Starting On’ drop-down menu (see screenshot number 1)
Note
- You can only schedule the meeting to occur at a future date from the drop-down menu.
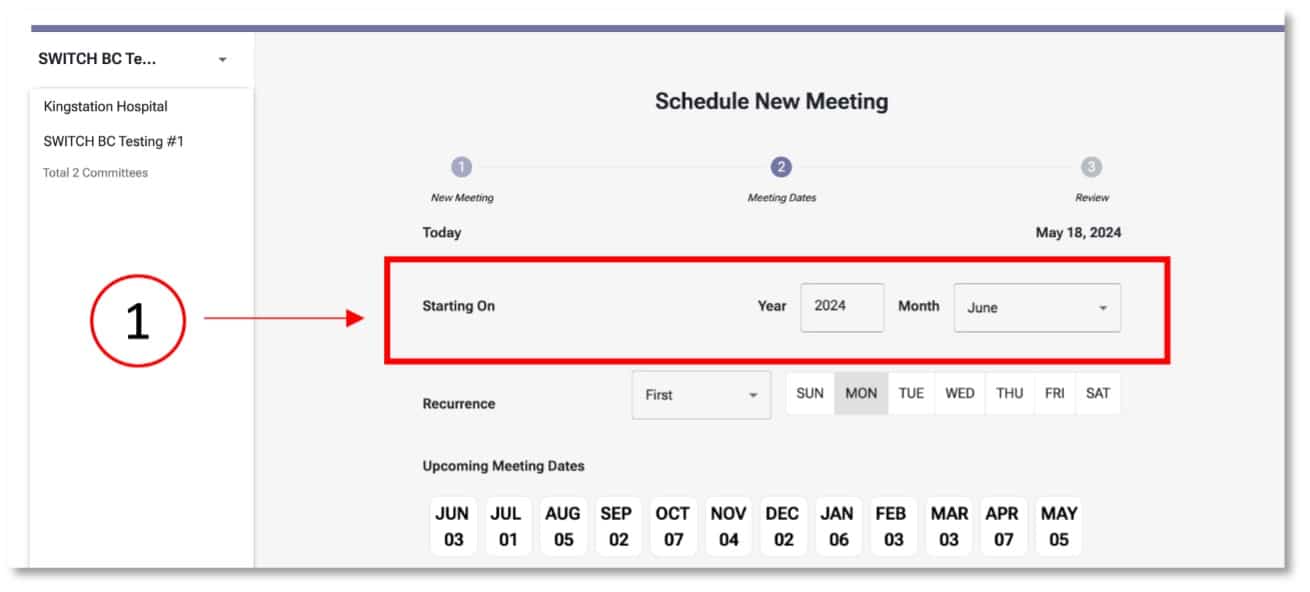
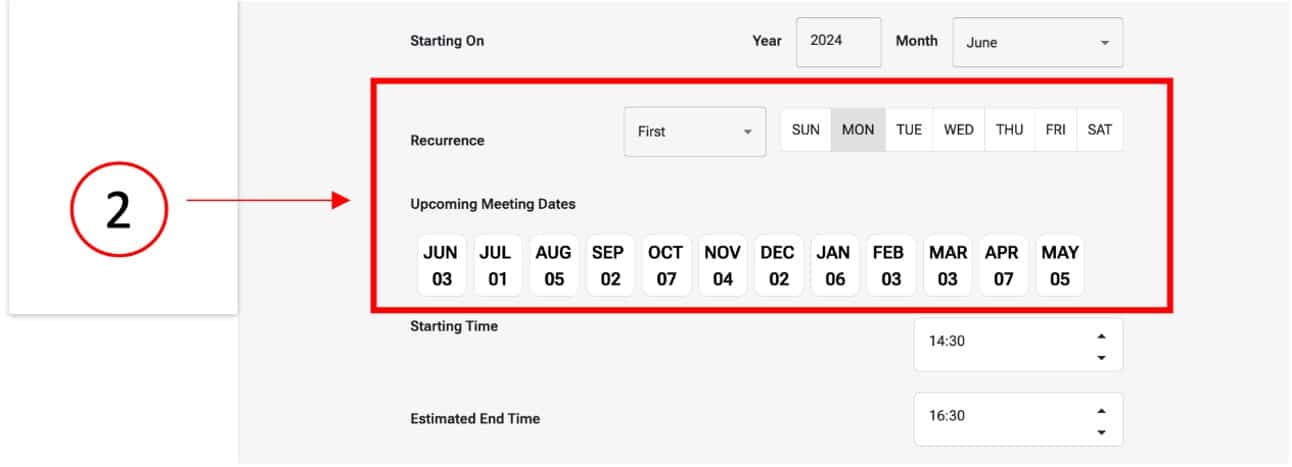
- Next, select the ‘Recurrence’ option (screenshot number 2) and choose the day required. To do this, use the drop-down list to select either the ‘First, Second, Third, or Fourth’ recurrence, followed by the chosen days of the week. Underneath the ‘Recurrence’ drop-down list, you will find all the subsequent meeting dates listed for your schedule.
Note
- Some options for months and weeks may not be available depending on the week of the month you are scheduling. If you select an unavailable option, a warning message will appear, as the system requires a minimum of 14 days between the scheduling date and the recurring meeting date.

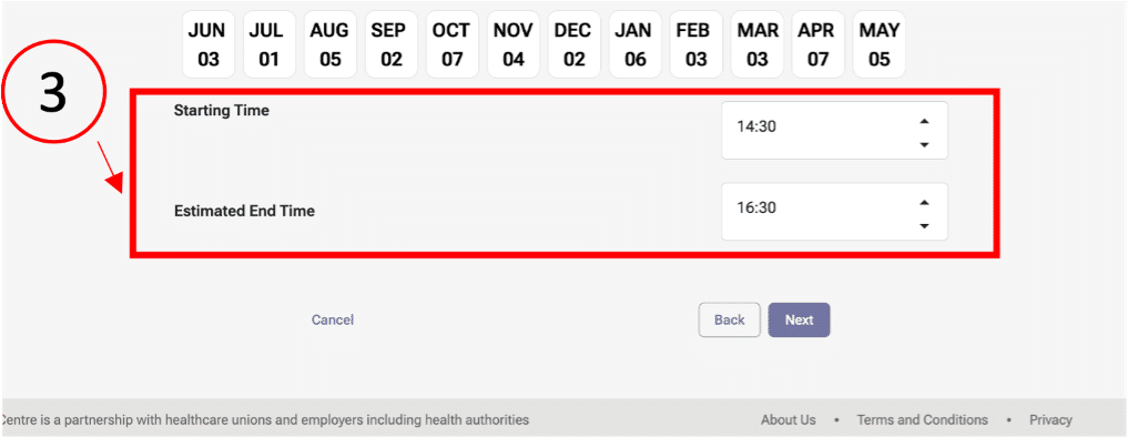
- Set the start and end times of the meeting (screenshot number 3). Do this by selecting the times from the ‘Starting Time’ and ‘Estimated End Time’ drop-down options.
Note
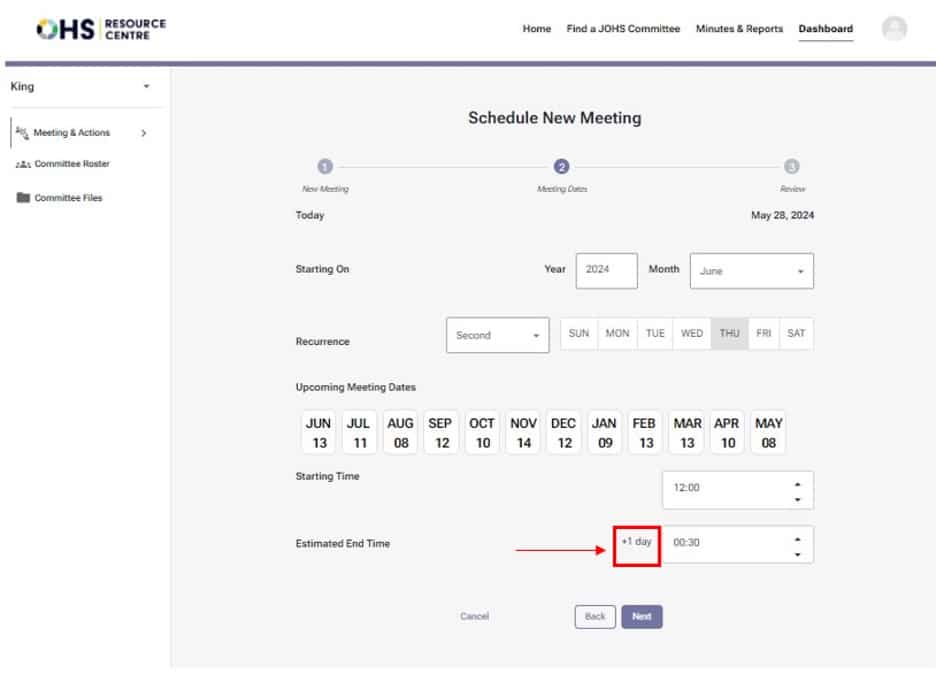
- If your estimated end time extends to the next day, the system will display a +1 next to the ‘Estimated End Time’ field as per the below screenshot.
- Once you have inputted the schedule details, select ‘Next’. You will then be directed to a review page to confirm your meeting details.
- If you need to adjust any of the meeting details, select the relevant ‘Edit’ option. This will take you back to the specific form on the previous page, allowing you to make changes.
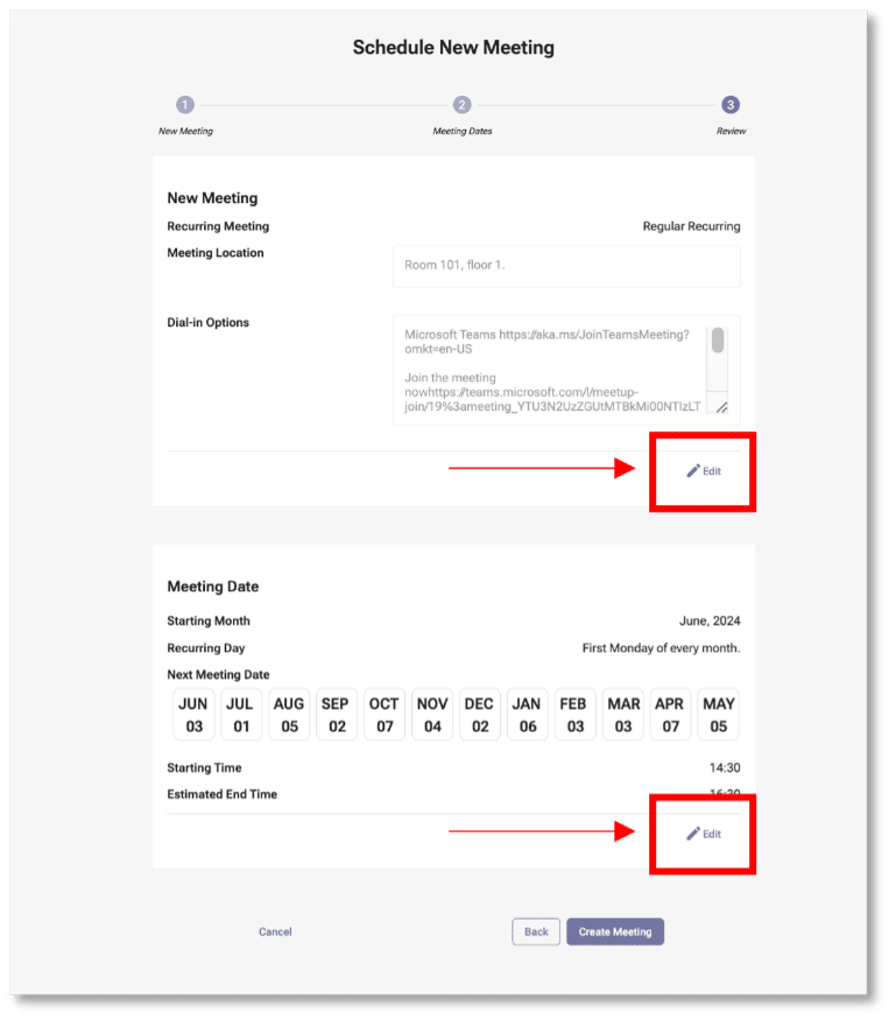
- If all details are correct, click the ‘Create Meeting’ button to finalize the scheduling.
Note
- Recipients will receive an invitation as an iCalendar file (ICS) when the draft and finalized agenda is sent. ICS files are commonly used for email invitations; when opened, the event details will automatically display, allowing recipients to add the event to their calendar


