


LEARN MORE


Starting the Special Meeting
Applies to:
- Admin Assistant (dedicated support for committee
- Committee Co-Chair (worker and employer)
- Committee Members with meeting recorder privileges
STEPS
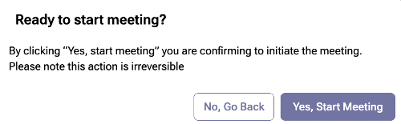
- To start the meeting, select the button at the top of the form, ‘Start Meeting’ on the New Meeting page. A pop-up box will appear asking you to confirm that you want this action to occur.
Note
- The meeting can be started at any time within 24 hours before the scheduled start time.
- As described in the ‘Meeting Management Manual’ quorum does not need to be met for a meeting to proceed. Even if the quorum is not met, the meeting will still take place, allowing discussions and decisions to continue even if the full committee is not present.
If quorum is met/not met, user will be able to perform following tasks:
- Edit Agenda Item Name, Duration, Purpose, Description and Discussion field and create new agenda item suggestion under ‘New Business’
- Upload/Delete files to the agenda item (can download existing attachments).
- Add new action items to agenda items.
- Can edit existing action items (change name, due date, status, assignees, description, etc.).
- Can make decisions (complete, reject, withhold etc.) to agenda item.
Note
- The ‘Discussion’ box has a 32K character limit, while the ‘Description’ field has a 500-character limit to prevent users from entering discussion notes in the description field. The description field is meant to capture a concise summary of the agenda item, whereas the discussion field is used to record detailed notes and discussions that take place during the meeting for that agenda item. Action items can be added under any agenda items: Standing, Old, or New Business.
- For special meetings, if adjourned without quorum, minutes can be edited or published just like a recurring meeting, and a PDF will be generated.
- If a meeting is not published within six weeks of its adjournment date, meeting recorders will receive an Email and RC notification reminding them to publish the minutes. This notification cannot be opted out by the user. It is mandatory by law to publish the meeting minutes, and vital to the committee’s metrics.
- Anyone, including Ex-officios, can add or remove files associated with an agenda item.
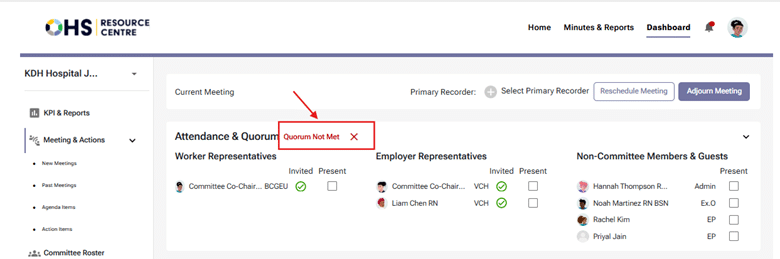
- To meet the quorum requirements in the OHS Resource Centre, you must ensure that the meeting meets the quorum established in the Committee’s Term of References (ToR) and set up in the ‘Committee Roster’ tab in the OHS Resource Centre.
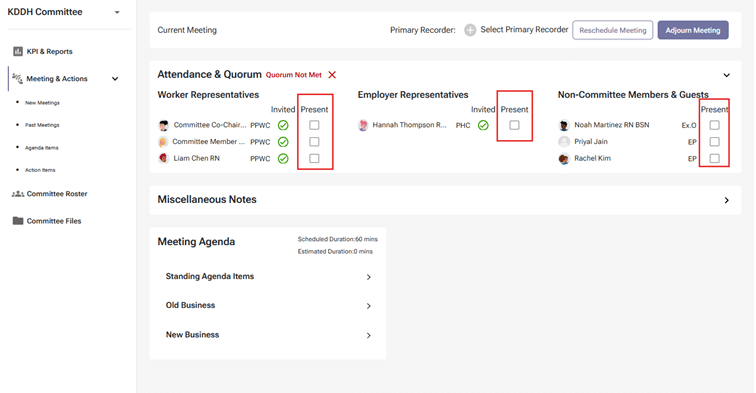
- Add the attending members by selecting the checkboxes next to their names (see below screenshot).
Note
- Attendance can be updated at any time during and even after the meeting is adjourned (before publishing the minutes). Even if a quorum is not met, the meeting can still proceed.
- One of the designated Meeting Recorders must be defined as the Primary Recorder, who will be ultimately responsible for recording the proceedings and making necessary changes during and after the meeting. The Primary Recorder can be selected from a dropdown list of all committee members. However, if a member who has not been previously assigned as a Meeting Recorder is selected, the system will not automatically grant them Meeting Recorder privileges. This is why the Meeting Recorders must be defined before the start of the meeting, in both the Edit Agenda and Finalized Agenda screens.
Note:
- It’s important to note that the Primary Recorder designation is for informational purposes only and does not carry additional functionality beyond what is granted to a Meeting Recorder.
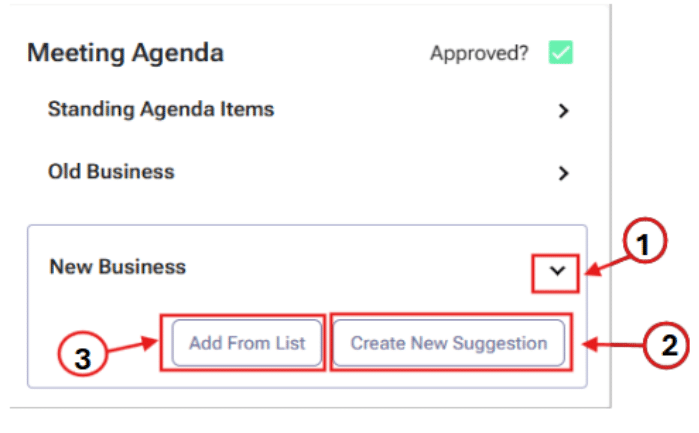
- After you approve the meeting agenda, you still can add agenda items in the old business and new business section. As shown in the screenshot, you can add ‘New Business’ (by following steps number 1 and 2) , or you can select “Add from List” as shown in step 3.
Note
- To add a standing agenda item to a special meeting agenda, you must include it during the set-up meeting process. Once the meeting invitation is sent, you cannot add new items to the agenda.
- Files for Old Business agenda items can be added during the draft or suggestion phase, as well as anytime from the Agenda Item Library by all committee members—including Admin Assistants, Co-chairs, Regular/Alternate Members, and Ex-officio members—to enhance flexibility and efficiency in managing supporting documents throughout all meeting phases.
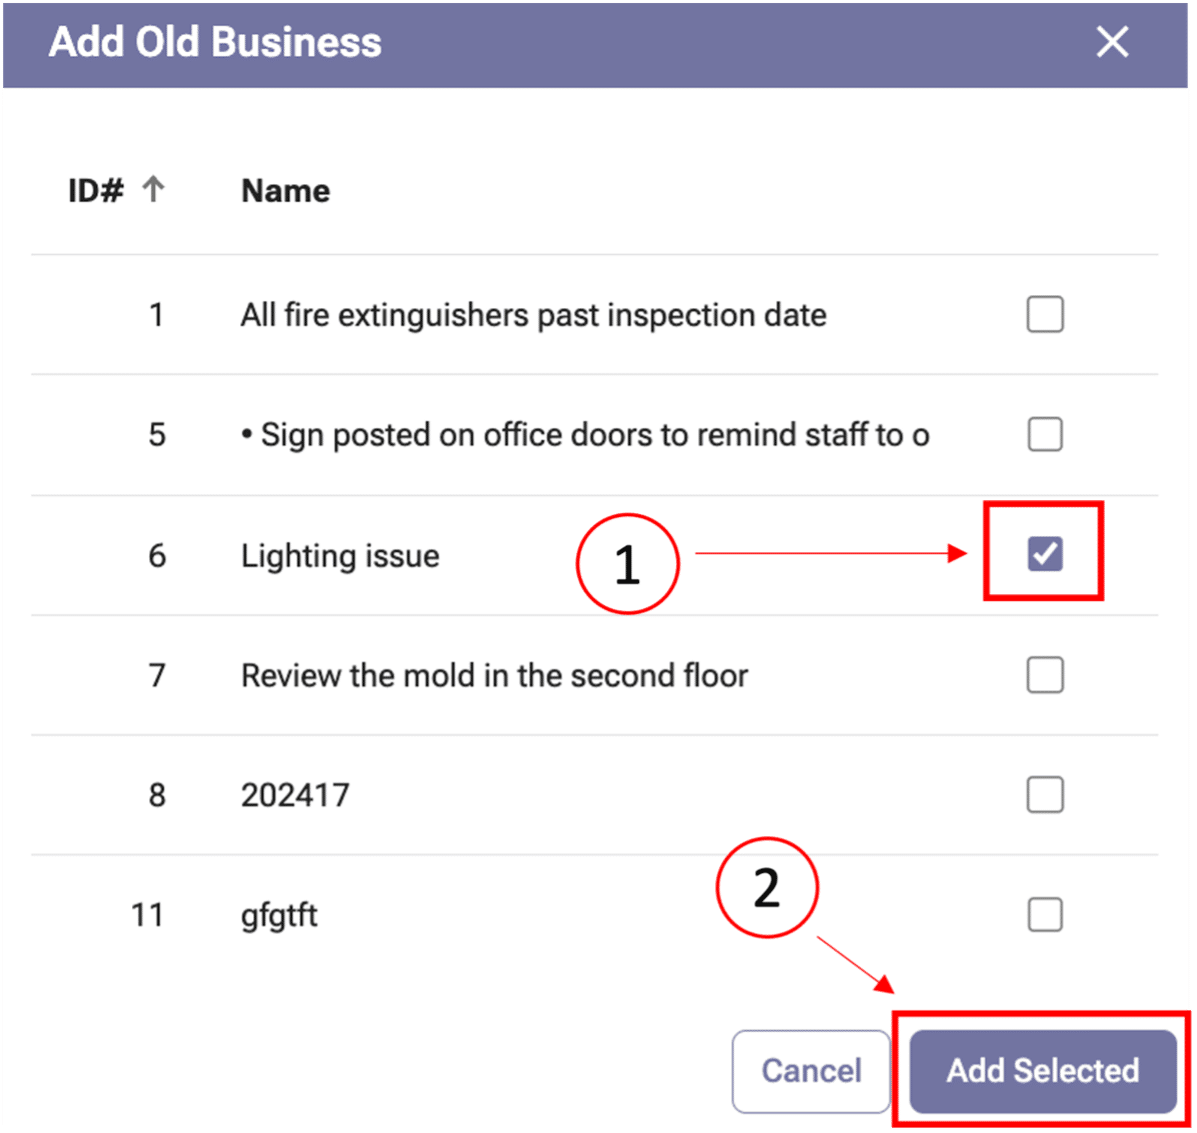
- When you select ‘Add From List,’ a pop-up box will appear that shows a list of existing agenda items. Select the items that need to be added to the agenda by selecting the checkbox, followed by ‘Add Selected’ (see screenshot).
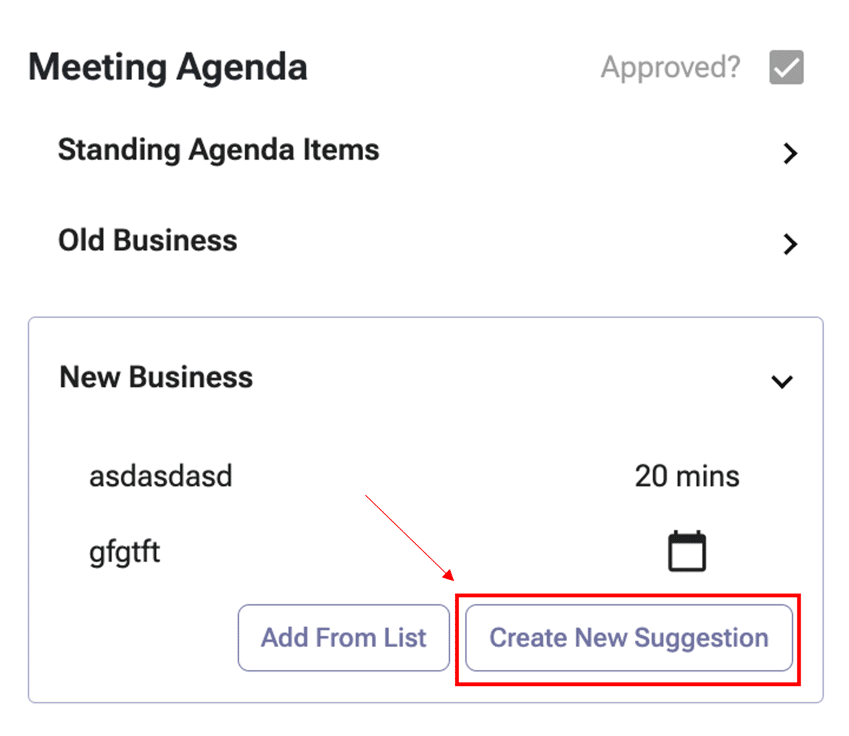
- You will then see that your agenda item to be discussed has been added to the agenda.
- If you need to add a new suggested item to the meeting agenda, select the option ‘Create New Suggestion’.
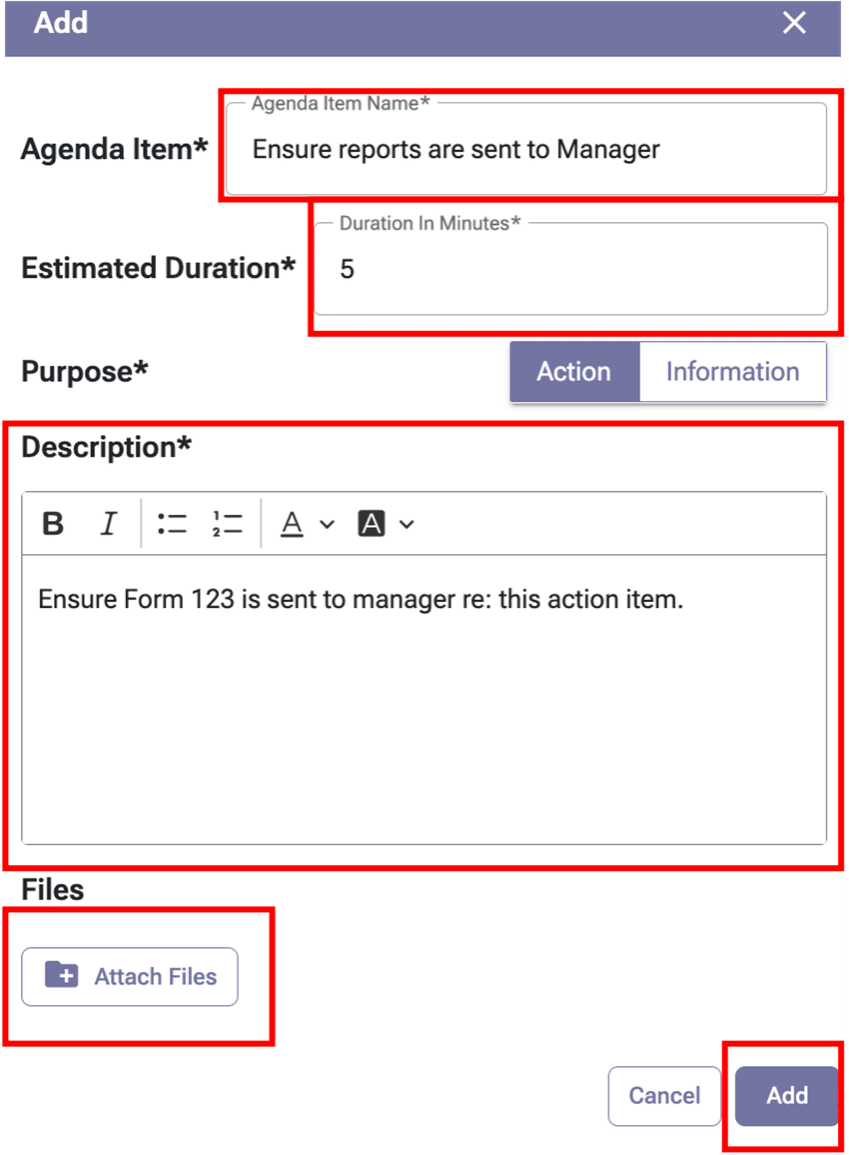
- This will open a form for you to add details on the new agenda item. In the screenshot of the form, you will find highlighted areas depicting where to add the agenda item, the estimated duration for the discussion, the purpose (action or information), a description for the group to help them understand the issue/item, and you can also add supporting files. Once this is complete, select the ‘Add’ button to move this to the agenda.
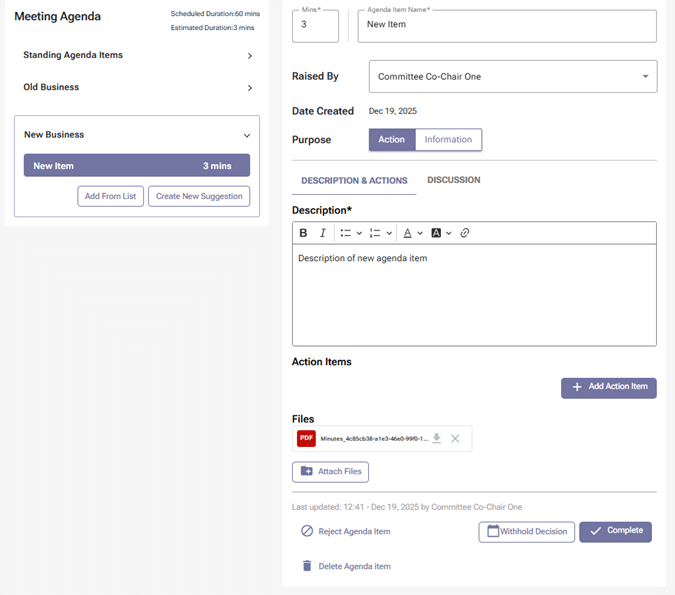
- To add supporting documents to agenda items, click the file icon (labelled number 1 in the below screenshot – ‘Attach Files’). To add action items related to an agenda item, click ‘+ Add Action Item’ (labelled number 2 in the screenshot).
- If the committee decides a New Business agenda item is not needed or has been added by mistake, you can remove it using the ‘Delete Agenda Item’ option (shown at the bottom of the screenshot below):
Note
- Please only click the ‘Complete’ button (labelled number 3 in the screenshot) when the committee decides the agenda item does not need further discussion, and the goal is complete. All the changes will be saved automatically.
- New Business agenda items can be deleted before a meeting is adjourned. However, Old Business agenda items cannot be deleted – they can only be rejected. The ‘Reject Agenda Item’ option serves this purpose:
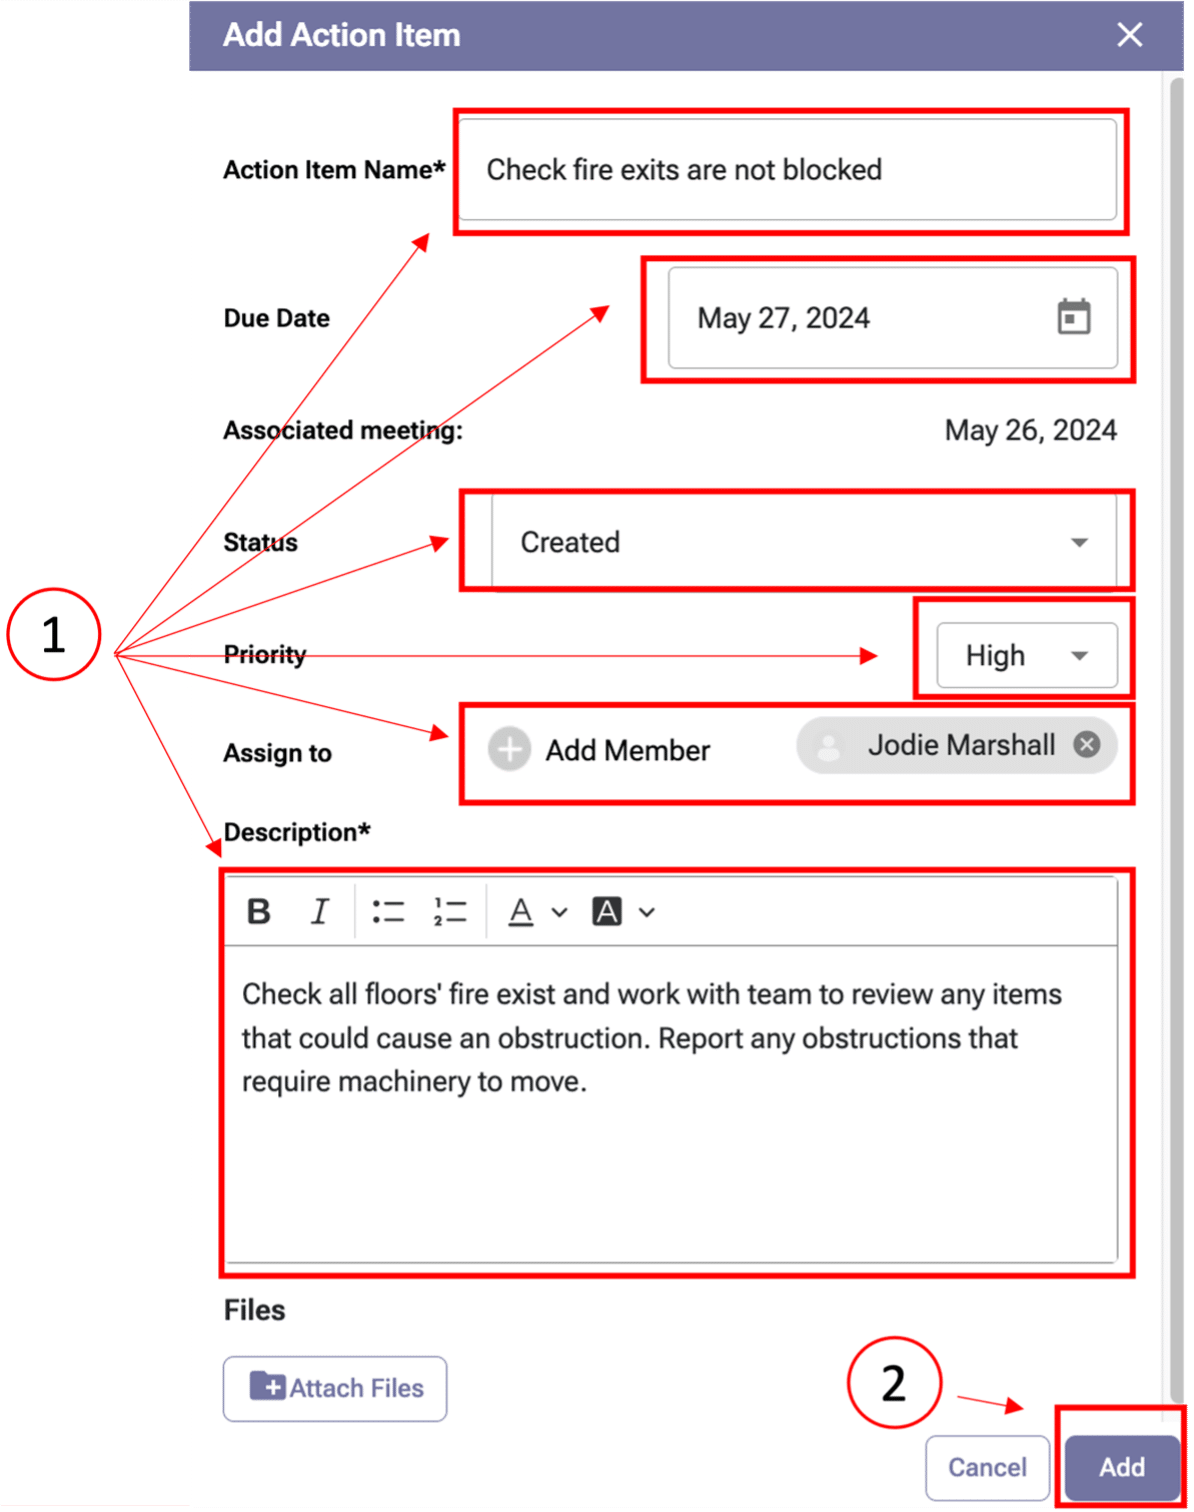
- When you click ‘Add Action Item’ to an agenda item, a pop-up box will appear for you to enter the details (see the ‘Add Action Item’ screenshot below).
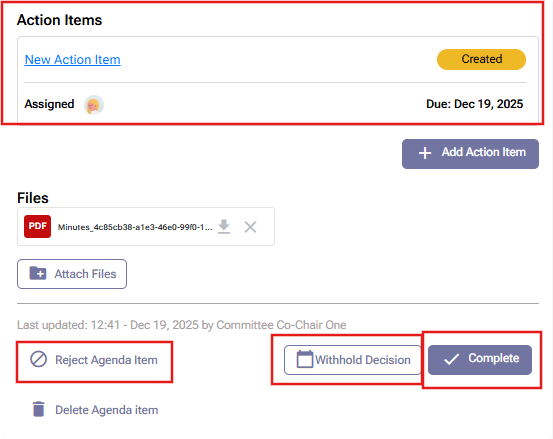
- Once the action item has been created, it will appear in the ‘Action Items’ section. It will be underlined and hyperlinked (as shown in the below screenshot, number 1). If you need to edit the action item, click the hyperlink, and modify it as required.
- After adding the action items, you can make any decision on the agenda item or move to the next agenda item; the changes will automatically be saved.
Note
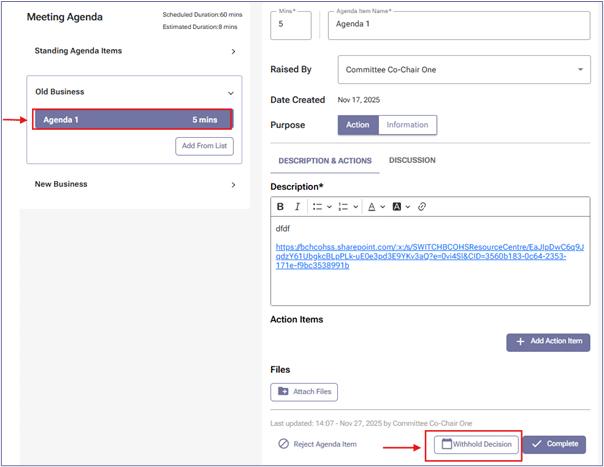
- An agenda item can be completed (number 3 in the screenshot) or rejected (number 2 in the screenshot). However, all its action items need to have cancelled or completed status. In the special meeting, if the committee does not decide during the meeting, they can click the ‘Withhold Decision’ button, and you can manually add it to the regular meeting. After you add it, it will appear in the old business section on the draft agenda page.
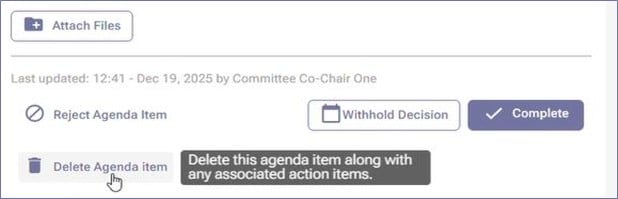
- When you hover over the buttons that reject, withhold, complete or delete* an agenda item, a reminder of the consequent actions is displayed. (*Only New Business agenda items can be deleted.)
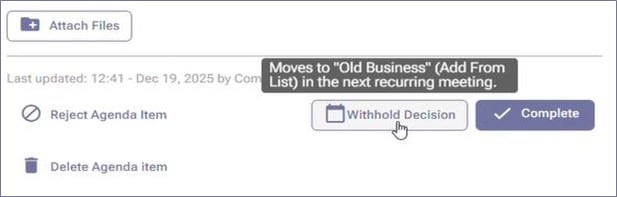

- If the agenda item does not get discussed or the committee has not decided by the end of the meeting, select the option ‘Withhold Decision’ (below screenshot). You can manually add it to the regular meeting. After you add it, it will appear in the next meeting agenda as an old business section on the draft agenda page (below screenshot).